Install and connect
Connecting a site takes an easyi18n project, one of its API keys and the plugin's zip file. Check the requirements first.
Prepare the project
- Create the project in the dashboard, or pick the one the site will use. Getting started covers a new project. Its source language has to be the language the site is written in.
- Add the target languages in the project's Settings → Languages. The plugin reads the list from the project and has no language setting of its own.
- Note the address of the project,
@workspace/project-slug. The first part is the workspace URL; a workspace without one cannot be found by the plugin. - Create an API key under Settings → API keys → New API key, for CI / scripts. The dashboard shows the key once.
The key needs these scopes. Scopes are checked exactly, so one does not include another.
| Scope | What the plugin does with it |
|---|---|
read | Verifies the connection and reads the project's languages; downloads published documents |
capture | Sends the strings of the theme and plugins |
write | Sends posts and pages. Only for Translate content |
translate | Starts translation runs. Only for Translate automatically |
Install the plugin
- In wp-admin, go to Plugins → Add New Plugin → Upload Plugin.
- Choose the easyi18n zip file and select Install Now, then Activate Plugin.
The admin menu gains an easyi18n entry with three screens: Overview, Settings and Diagnostics. Only administrators see them.
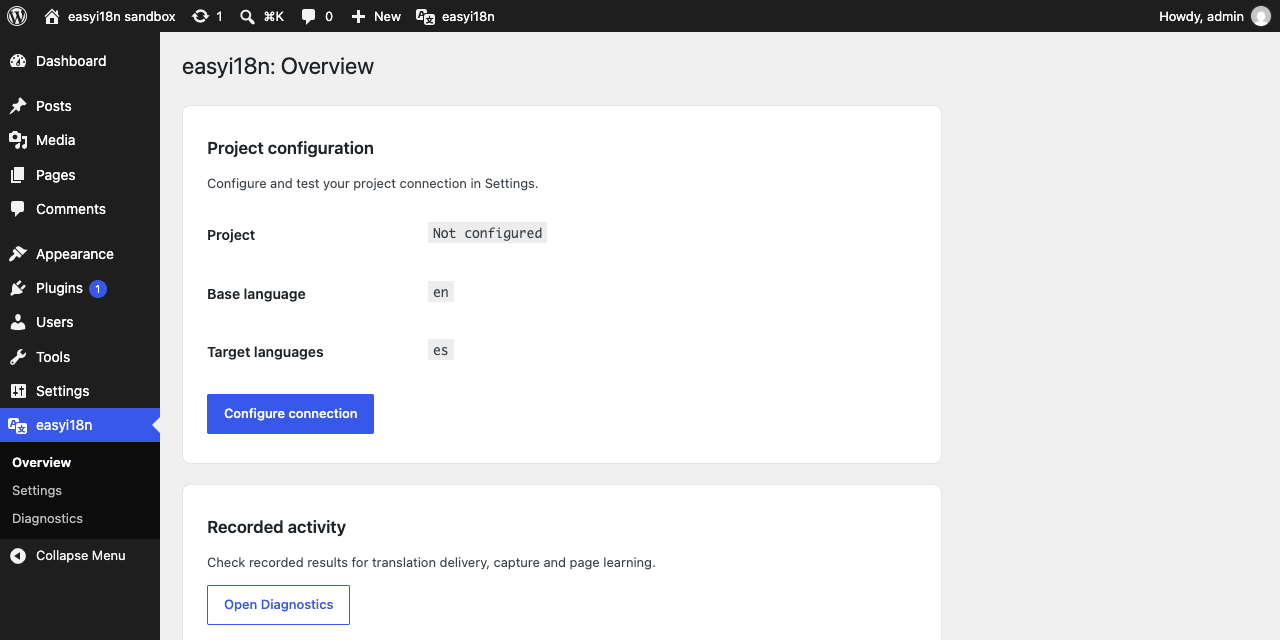
If the site uses Plain permalinks, wp-admin shows a notice once the site has target languages: language URLs need pretty permalinks. Pick any other structure under Settings → Permalinks.
Connect the project
Open easyi18n → Settings and expand Connection.
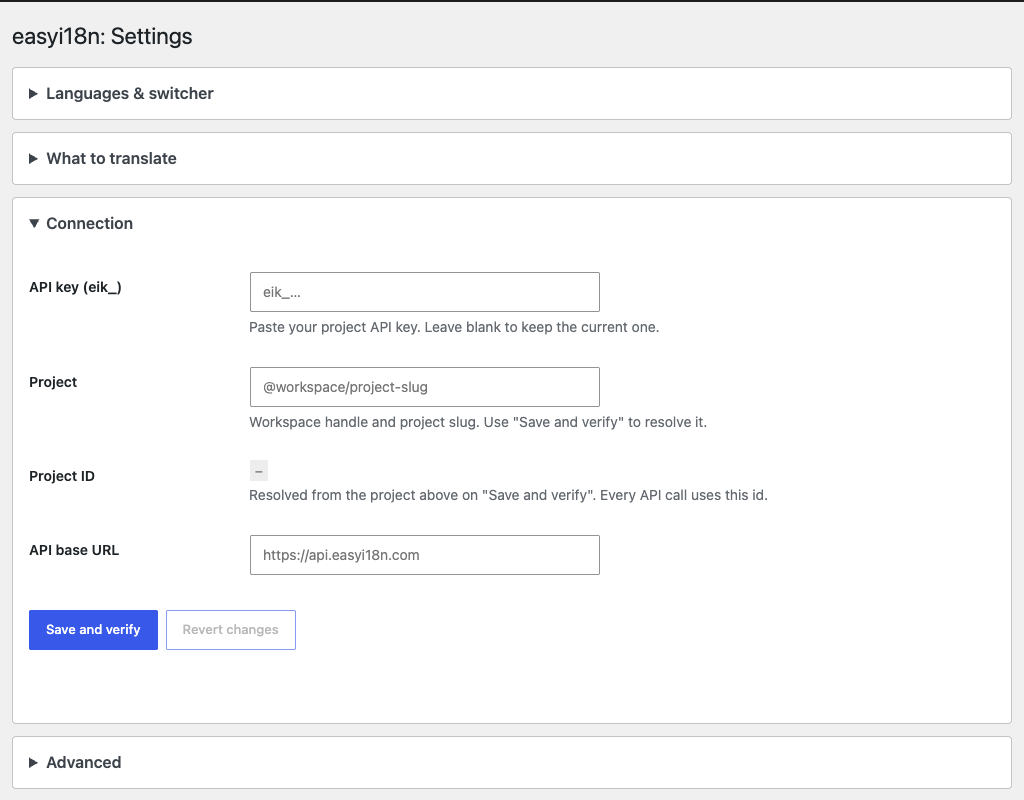
- Paste the key in API key (eik_). The field is write-only: after a save it shows a masked placeholder, and leaving it blank keeps the stored key.
- Enter the project address in Project, as
@workspace/project-slug. - Enter
https://api.easyi18n.comin API base URL. The field shows that address as a hint and does not fill it in. An address that is nothttpsis refused, because the key travels with every request. - Select Save and verify.
The plugin looks the project up, reads its languages and saves the connection only if that worked. On success it answers "Connection OK — project reachable, base language is en" with the project's own source language, and fills three read-only rows: Project ID in this group, and Base language and Target languages under Languages & switcher.
When it fails, nothing is saved and the message names the cause:
| Message | What to check |
|---|---|
| Fill in the API key and base URL before testing | API base URL is empty |
| That does not look like an easyi18n API key | The paste; a key starts with eik_ |
| The project must look like "@workspace/project-slug" | The format of Project |
| Could not reach the API | The base URL, and whether the server can make outgoing HTTPS requests |
| The API key was rejected (401) | The key was revoked or belongs to another project |
| The key is valid but lacks the scope | The key has no read scope |
| Workspace or project not found (404) | The handle and the slug, and that the workspace URL is set |
A success can carry a warning. If Translate content is on in the plugin and the Content dimension is off in the project, the message says that no post will be translated until one of the two changes.
After you add or remove a language in the project, select Save and verify again: the plugin reads the list of languages only then.
Choose what to translate
A connected site translates nothing yet. Expand What to translate and switch on one or both:
- The text domains of your theme and plugins, under Translate these. See Theme and plugin strings.
- Translate content, for posts and pages. See Posts and pages.
Each group of the Settings screen has its own Save changes button and saves only its own fields.
The first sync
Nothing happens at the moment you save. The plugin works in scheduled passes, every 15 minutes, and each pass does one thing:
- Visitors load pages, and the plugin records the strings of the text domains you switched on.
- A pass sends the new strings to the project. They appear in the keys editor, where the Captured only filter lists the ones that still lack a translation.
- You translate them and publish a version.
- A pass notices the new version, downloads each language that changed and
writes its translation files. From then on
/es/shows the translated strings.
easyi18n → Diagnostics shows when each pass last ran and what it did. Diagnostics explains the rows.
WP-Cron runs when someone visits the site. If the site gets little traffic,
call wp-cron.php from a system cron job so the passes keep their schedule.
After connecting
- Add the language switcher to a menu, a header or a widget area. The plugin does not place it for you.
- Open Tools → Site Health. If it reports "WordPress language packs are missing", install them from the links in that report. Without the pack of a language, dates and other text of WordPress itself stay in English on that language's pages.